|
|
Advanced UV Mapping (a continuation of the ugly uv map tutorial) When uv mapping a full character, your faced with one problem, which is how do I fit all these uvs into one tiny uv set. In this tutorial ill explain the different methods to stetting up uvs on a full character. Then i'll also show you my method and why I prefer them over the conventional methods. First we'll talk about the lazy and the conventional methods. A lot of people like to do the auto setup. In Maya you would goto "Edit Polygons\Texture\Automatic Mapping"
Maya will setup its uvs's where there's minimal distortion. It takes the whole object that you've selected and pulls its uv's apart into chunks or smaller partitions and makes uvset. Doing this makes it harder to recognize the tiny pieces if you want to paint it in a 2d painting program like Photoshop or Painter. The method I explained in "Ugly uvmap tutorial" lets you pull the uvs into a set where its recognizable enough to paint in a 2d painting program. Which is nice enough for a small character but if you want to setup a full character. You can either put all the uvs into the tiny grid that were all used to using or split them into any four quadrants. But first before I move along; I want to talk about the pros and cons. Setting all your uvs onto a single quadrant. Cons: Very dirty sometimes, Less flexibility, Less room to work Setting up your uvs to take advantage of multiple
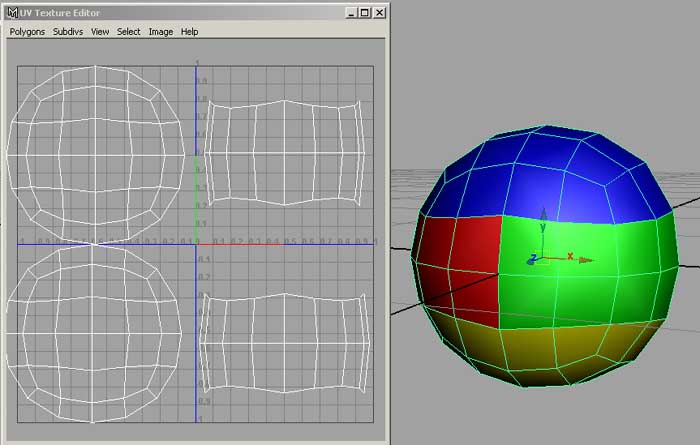
maps. (multi quadrants.) Cons: Time consuming, More Planning is required. This Image to the bottom illustrates a sphere that has the uvs spread out to all four quadrants.
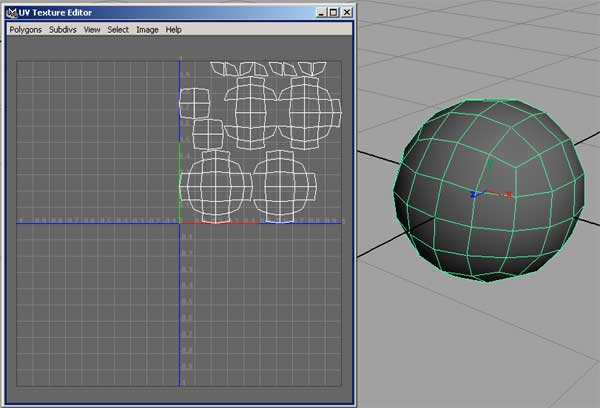
This image below illustrates the sphere with all the uvs on one quadrant. (typical uv setup)
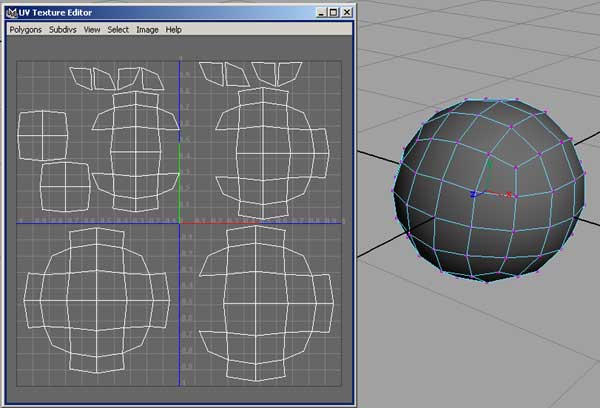
This image below shows a more advanced uvset. The uvs were projected then placed in each quadrant. Then I right clicked on the UV texture Editor and selected faces. Selected all the faces in each quadrant one by one and applied its own own shader to it. Make sure that you keep the uvs within their quadrant.
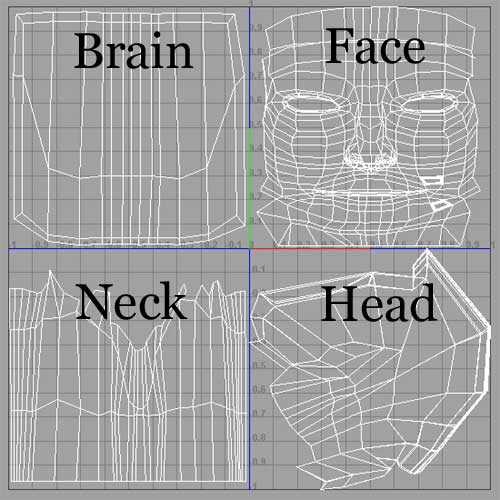
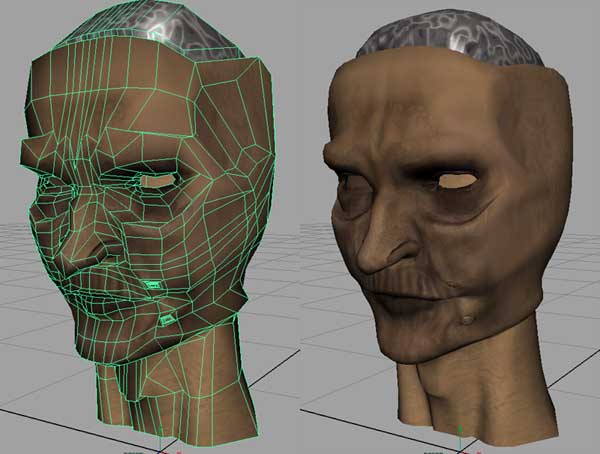
The only real problem with a setup like this you get true uv seems. Where if you applied a color map to each shader you would see where the textures intersect. One thing you can do is add a base color two all the color maps then blend them in. texture by texture. If you have Deep Paint 3d this process will be a bit easier. Next We'll apply what we talked about to a a model I have here. Here's my character with with the uvs for just the head split up into four quadrants. (My example shows just this head, but you apply the same technique to the whole body)
Now what I've done is take a screen capture of each quadrant. Cropped then painted the map. Next I applied the map to a shader. Then selected the group of polys that correspond with the map I painted within "uv texture editor" and applied that shader to it.
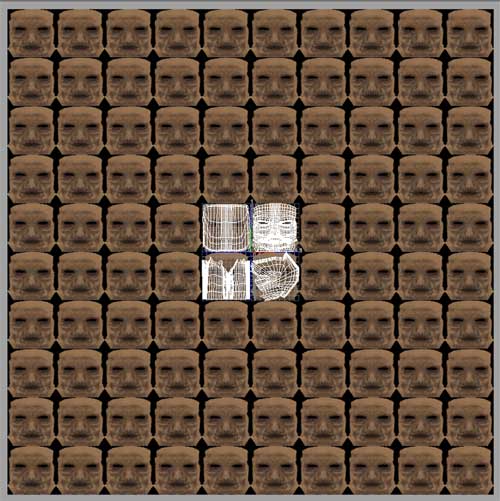
Tip: you can go past the four
grids that Maya's uv texture and apply an up to 100 shaders with high
res. images, and have only one uvSet. Make sure they stay within 0-1 uv
space. A good way to see an example is this image below. Tip: If you like to use Lightwave and Maya and you create multiple uvSets in Lightwave, then decide to send it to maya via obj. Your obj will come into maya with all the uvSets on top of one another in the top right quadrant. To fix that you can just select the group of faces that have the seperate uvs and convert selection to uvs then move them into they're own quadrant.
If you'd like to dissect/reverse engineer
this character you can download him here. That's it for this tutorial. Have Fun! :) Written by Sama You can also find me in #Noir, #3d_life, or #Maya on the server EFnet on IRC. . |